
Even a perfectly custom Joyseat won’t feel right if it’s installed wrong. Dialling in saddle height, fore‑aft position and tilt makes the difference between floating and fidgeting, while using the right tools, clamps and torque ensures the saddle stays secure. This guide walks you through step‑by‑step setup and care so your 3D‑printed saddle delivers the comfort and support it’s designed for.
Even the best saddle in the world won't do you any good if it's not properly set up. The ideal thing to do, of course, is to visit an experienced bike fitter who can help you with the whole set-up process. However, you can also set up your Joyseat at home with satisfactory results.
To get the correct saddle position, saddle height, fore-aft position, and tilt need to be adjusted. Pay due attention to these 3 parameters as they will affect how you feel on the bike and any deviation will negatively affect your comfort and performance. The bike will be harder to handle and poor saddle positioning can lead to health complications.
We've prepared a short video tutorial to show you everything you need to know. The tutorial only covers the saddle setup, not the whole seat. Finding the right riding position is a complex discipline involving the length of the pedal cranks, the position of the trunks on the stem, the length of the stem and much more. To get the perfect riding position and saddle position, we recommend seeing an experienced bike fitter with years of experience.
Video Tutorial for Joyseat setup
Follow the instructions to set up the reference position for the saddle. Then fine-tune it during your first rides. Therefore, pay close attention to your body when riding and really feel what is happening to it. If possible, take a video or have friends take a photo of you so you can see what your riding position actually looks like. This will help you assess what parameters you still need to change.

How to Securely Mount the Saddle
The Joyseat PLUS features a shell handcrafted from nylon reinforced with glass fibres. The rails are made of stainless steel, are round, and have dimensions of 7×7 mm.
On the other hand the shells of Joyseat PRO and Joyseat ULTRA are handcrafted from carbon fibre, a modern lightweight yet highly durable material. The rails on both models are oval-shaped with dimensions of 7×9 mm. Not all seatposts are equipped with a clamp compatible with oval rails. If you need to replace the clamp, we recommend contacting your seatpost manufacturer or our customer support team – we’ll be happy to advise you. You can also find more information in our dedicated article about seatposts.
To ensure the saddle is securely mounted:
- make sure your seatpost has the right clamp,
- before adjusting the fore-aft position of the saddle, fix it approximately in the centre of the rails,
- never adjust the saddle beyond the extreme positions marked on the graphics below,
- adhere to the correct tightening torque:
- for two-bolt design seatposts (clamping from top and bottom), maximum torque is 6–7 Nm, maximum torque for steel rails is 12–13 Nm.
- for one-bolt design seatposts (clamping from sides), maximum torque is 9–11 Nm, maximum torque for steel rails is 14–15 Nm.

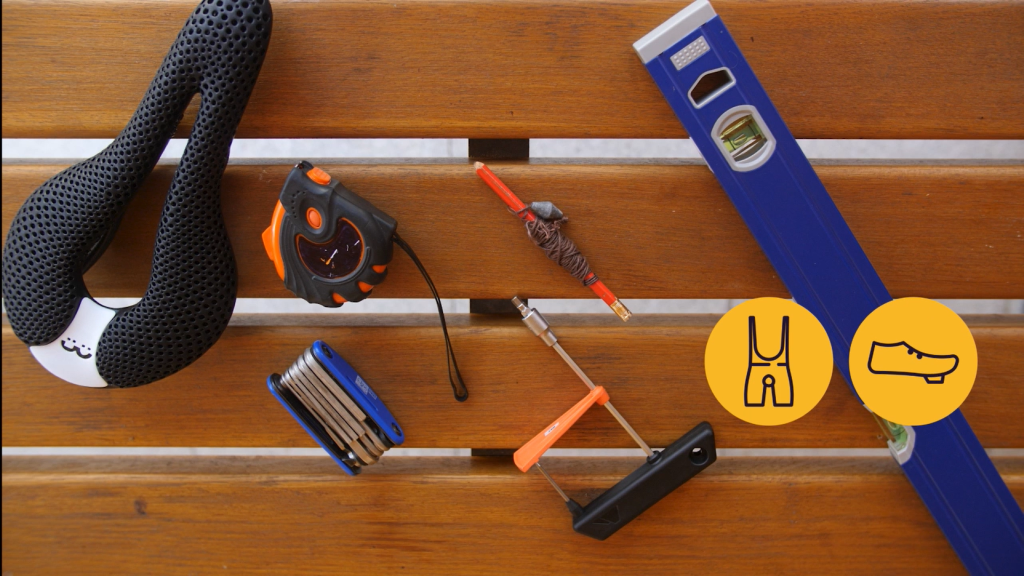
What you will need
- tape measure
- spirit level
- pencil or pen
- plumb line
- multi-tool
- cycling shorts and shoes you usually ride in
Saddle Height
The saddle height will affect whether you can pedal efficiently or not. But the technical definition says: Saddle height is the distance between the centre of the bike and the centre of the saddle (see photo). The centre of the saddle is the middle of the extreme points of the saddle length.

Use the LeMond method to measure the starting saddle height and measure the inside leg length:
-
Take the measurements standing up and without shoes.
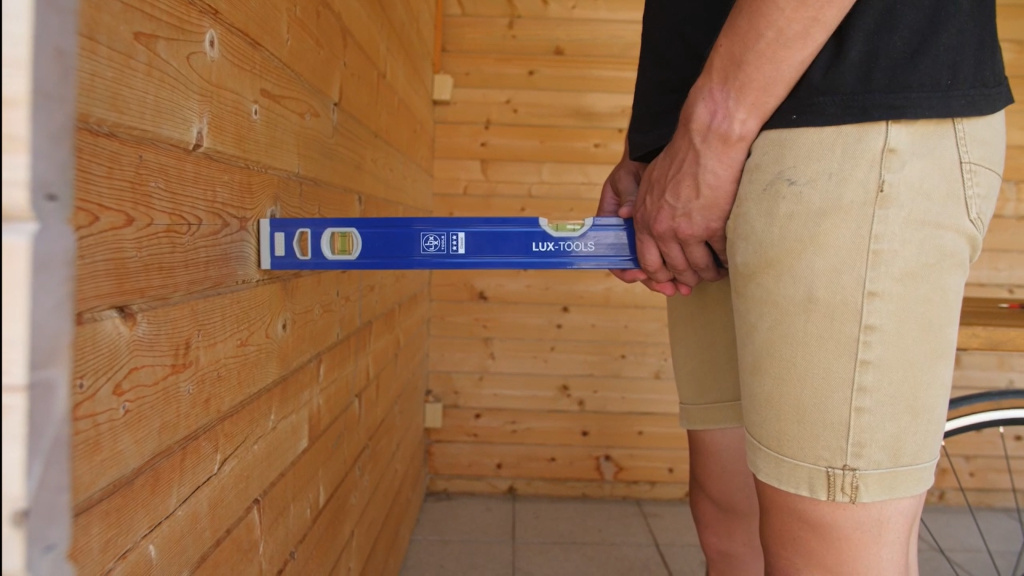
-
Place the spirit level (or a stick, ruler, rod, etc.) between your legs and slide it up to the level where you feel a slight pressure in your crotch.
-
Level off to a horizontal position.
-
Measure the height from the floor to the top of the level.
-
Multiply the measured inner length by the constant 0.883. The resulting number is the default value for your saddle height. Example: measured inner length 82 cm multiplied by 0.883 gives you the saddle height of 68.3 cm.
-
Tighten the seatpost clamp and make sure the saddle is fixed and cannot be moved.
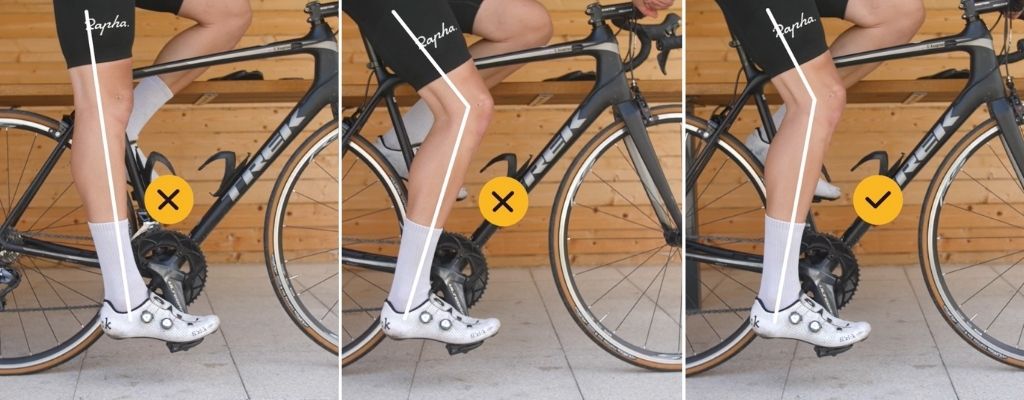
With your saddle height adjusted, sit on your bike. You can lean against a table or a chair to support yourself. Turn the pedals backwards a few times. If your pelvis moves from side to side as you pedal, your legs are fully stretched and you're extending your toes to the pedal, your saddle is too high. Drop the saddle lower. If your legs are too bent when pedaling, your saddle is too low and you increase the risk of overstretching your knee joints. Bring the saddle higher (see photo).
Fore-Aft Position
The fore-aft position is the distance of the saddle tip in relation to the pedal axis. You adjust this position by sliding the saddle rails in the seatpost clamp.
-
Fix the saddle approximately in the middle of the scale on the rails.
-
Sit on the bike in the usual riding position with your shoes on the pedals (clip in if you have cleats).
-
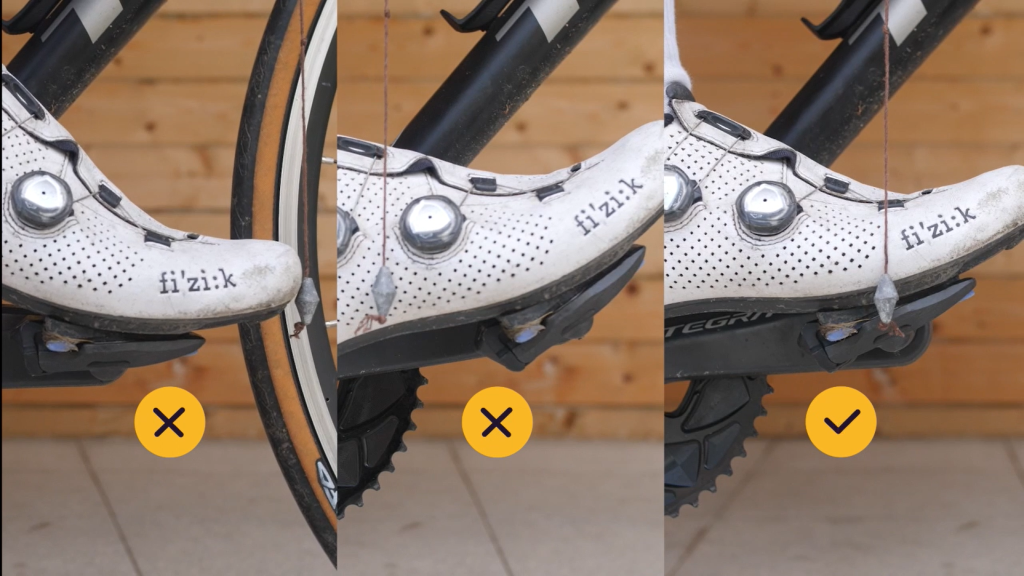
Bring the pedals to a horizontal position.
-
Run a plumb line across the middle of the kneecap of the front foot.
-
The plumb line string should pass through the pedal axis.
-
If the plumb line is behind the axis, you need to move the saddle forward. If it is in front of the pedal axis, you must move the saddle backwards.
When changing the saddle's fore-aft position, ensure you still have the correct saddle height (see "Saddle Height").
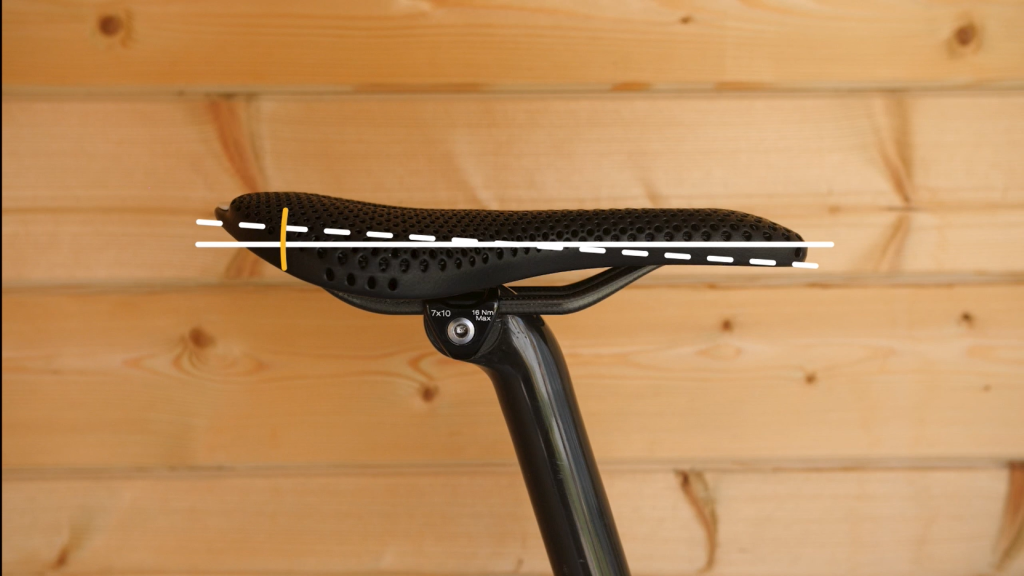
Saddle Tilt
In general, we recommend a saddle inclination between -1° and -2°.
-
The default position for adjustment is horizontal, i.e., 0°. Check with a spirit level.
-
The tip of the saddle folds slightly down. You can also check the correct inclination with your phone, if it has the spirit level function.
-
The correct saddle tilt will give you sufficient support for the tips of your sit bones. The arms are relaxed, and you do not feel discomfort in the seating area.
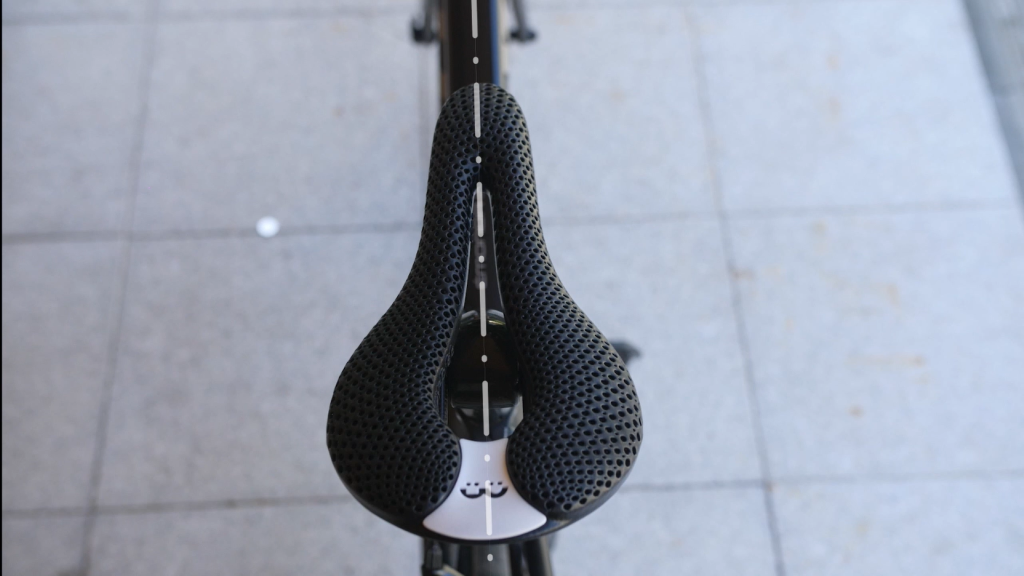
Remember to ensure your saddle is aligned with the bike frame, i.e., not turned to the left or right.
And That's It
You have just set up your Joyseat to fit you best. It's important to note that this saddle adjustment is a guide only. Any values set according to this manual are for reference. It is likely that you will still tune the saddle to your individual needs. We recommend that you have your picture taken in your riding position during the ride and feel how you feel on the bike. For example, observe that you do not overstretch your legs, if your pelvis rotates unnecessarily or if you transfer too much weight to your hands. For a professional set-up, we recommend you visit a bike fitter who will check your seat and adjust it if necessary.
Technical Specifications of Joyseat
Materials:
- Joyseat PLUS shells are made of nylon with fiberglass filler. The saddle rails are made of stainless steel.
- The Joyseat PRO rails and shell are made of carbon composite This is carbon fibre bonded with epoxy resin.
- The Joyseat ULTRA shell is made of UD carbon, the rails are made of carbon composite.
- The top of the Joyseat PLUS, PRO and ULTRA is made of thermoplastic polyurethane (TPU).
Joyseat Weight: The total weight of the PLUS saddle starts from 220g. The total weight of the PRO saddle starts from 165 g. The total weight of the ULTRA saddle starts from 155 g. Depending on the parameters of each cyclist.
Weight limit: The weight limit for Joyseat PLUS is unlimited. The weight limit for Joyseat PRO is 100 kg, while for Joyseat ULTRA it is 110 kg. We have thoroughly tested the saddles according to international ISO standards.
How to Care for Your Joyseat
We have good news for you. Joyseat does not require any special care. It is made of high-quality, highly durable materials so that you can ride it in all weather conditions. The 3D padding does not need to be lubricated or protected from rain or sun. It is a good idea to wipe it occasionally with a damp cloth, and if it is muddy or otherwise dirty, simply rinse it with a stream of water, which will drain away on its own. Due to weathering and friction, the top 3D printed layer of the saddle may change from glossy to matt over time. This is a normal which does not affect the functionality of the saddle.

However, it is strongly recommended to check all bolts for proper tightening on a regular basis.
If you have any questions, don't hesitate to contact our customer support. Happy cycling!


